Your First Camping Trip: A Complete Beginner’s Plan
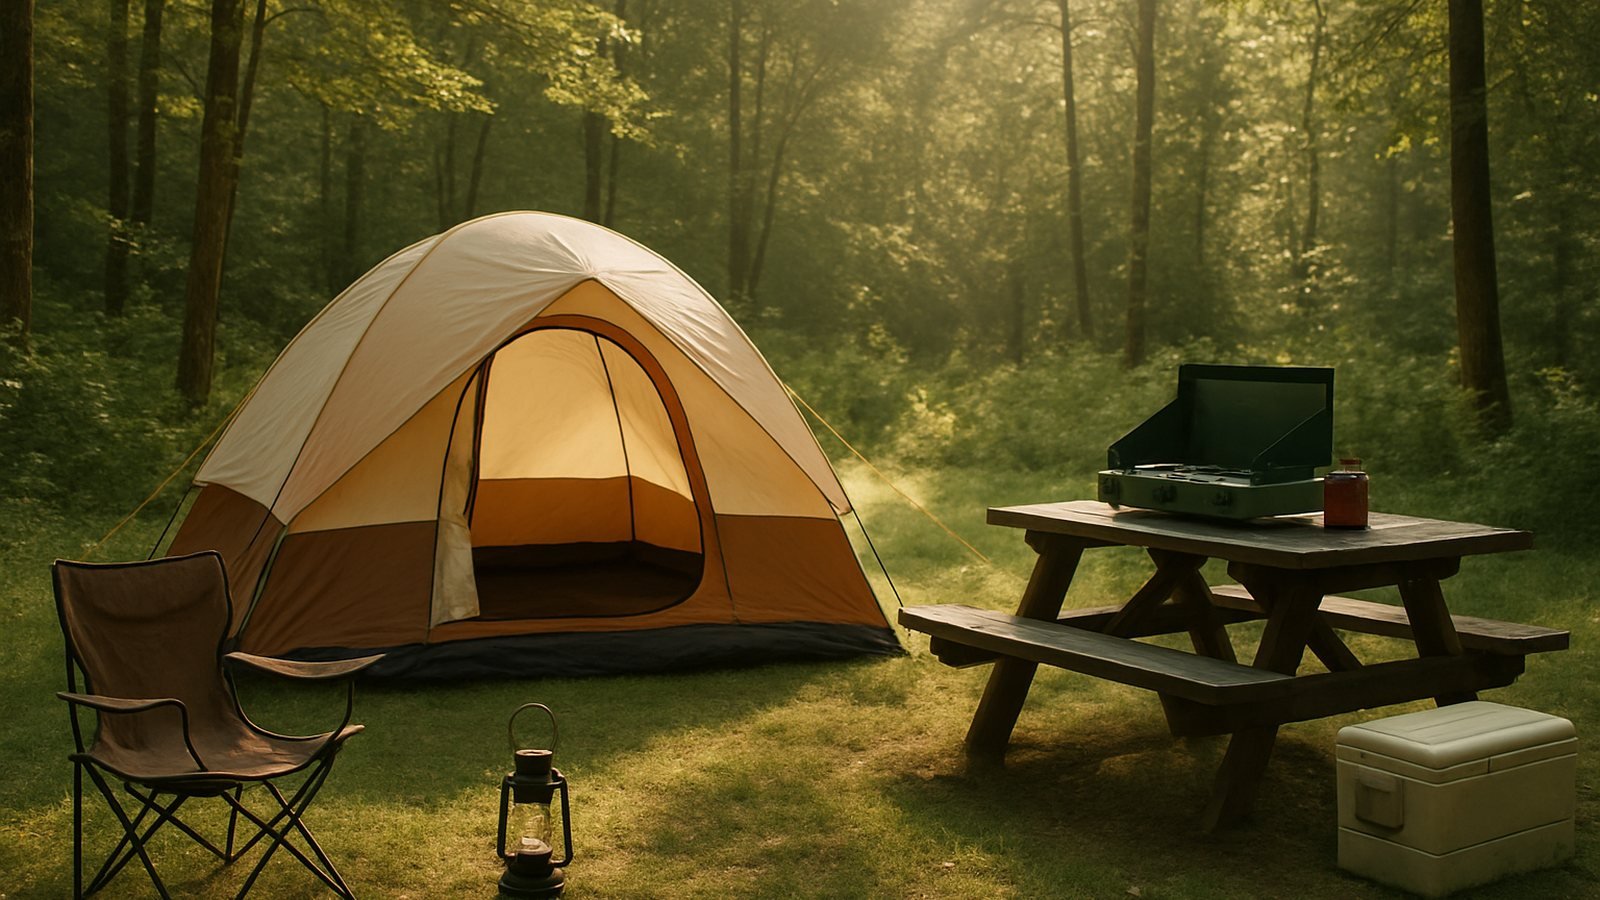
This page provides a step-by-step guide for first-time campers to ensure a fun and safe adventure. It covers choosing a campsite, packing the right gear, planning meals, and setting up camp. You can also watch a helpful video if you prefer visual instructions.
Your first camping trip should be fun, not a test of endurance. The secret is simple: keep it close, keep it short, and plan just enough that small surprises stay small. This guide walks you through a complete beginner’s plan, from choosing where to go to packing, setting up camp, cooking, sleeping well and packing out, so you come home already looking forward to the next trip.
Prefer to watch? The video covers this whole plan in about eight minutes. Jump to a part:
- 0:32 Choose the right first campground
- 1:17 The big three: shelter, sleep and kitchen
- 2:27 The small things that make a big difference
- 4:09 Practice before you go
- 4:32 Setting up camp
- 5:13 Easy first-trip meals
- 6:17 Food storage and wildlife
- 6:36 What to expect your first night
- 7:13 Enjoy it, then Leave No Trace
Step 1: Choose the Right Kind of Trip
For a first trip, choose:
- A developed campground, with marked sites, water, restrooms and often a camp host. Save remote backcountry sites for later.
- A location within one to two hours of home. If the weather turns or you forgot something important, you can adjust easily.
- One or two nights. One night teaches you what you need; two nights lets you actually relax.
- Mild weather. Late spring, early summer and early fall are ideal in most regions. Avoid your first trip being in freezing nights or a heat wave.
State parks are a great starting point. They usually have good facilities, clear rules, rangers on duty and easy online reservations.
Step 2: Reserve a Good Site
Many popular campgrounds book up weeks or months ahead, especially for summer weekends. When you reserve:
- Look at the campground map. A site a short walk from restrooms and water is convenient, but not right next to them, where foot traffic and lights are constant.
- Read the site description for the tent pad size and whether the site is level.
- Check for shade if camping in warm weather.
- Note check-in and check-out times, quiet hours, pet rules and fire rules.
Step 3: Gather the Core Gear
You do not need to buy everything at once. Borrowing or renting gear for your first trip is a smart way to learn what you like before spending money. Many outdoor retailers and some parks rent tents, sleeping bags and stoves.
Shelter
- A tent rated for at least the number of people sleeping in it; a “4-person” tent is comfortable for two adults with gear.
- A footprint or ground tarp slightly smaller than the tent floor.
- Extra stakes and a mallet or a rock to drive them.
Sleep system
- A sleeping bag rated a little colder than the lowest expected temperature.
- A sleeping pad. This matters more than most beginners expect; the ground pulls heat from your body.
- A pillow, or a stuff sack filled with clothes.
Kitchen
- A two-burner camp stove and fuel, plus a lighter and matches.
- A pot, a pan, utensils, plates, cups and a sharp knife.
- A cooler with ice or ice packs.
- Water jugs, a wash basin, biodegradable soap, a sponge and a towel.
- Trash bags.
Camp essentials
- A headlamp for each person, plus a lantern.
- Camp chairs.
- A first aid kit.
- Sunscreen, insect repellent and a hat.
- Rain gear for everyone.
- Layers of clothing, including something warm for evenings. Nights are often cooler than you expect.
- A small tool kit: multitool, duct tape, cord.
Step 4: Practice at Home
Set up your tent in the backyard or living room at least once before the trip. Figure out which poles go where, how the rainfly attaches and how to stake it. Fifteen minutes of practice at home saves an hour of frustration in fading light. Light the stove once too, so you know how it works.
Step 5: Plan Simple Meals
Camp cooking should be easy for your first trip. Plan meals with few ingredients and minimal cleanup, and prep at home.
- Dinner one: foil-packet sausage, potatoes and peppers, or pre-made chili reheated in a pot.
- Breakfast: scrambled eggs and pre-cooked bacon, or oatmeal with fruit, plus coffee or cocoa.
- Lunch: sandwiches or wraps, fruit and snacks.
- Dinner two: pasta with jarred sauce, or burgers.
- Treat: s’mores, of course, if fires are allowed.
Chop vegetables, crack eggs into a sealed bottle and marinate meat at home. Freeze water bottles and use them as ice packs that become drinking water later.
Step 6: Pack Smart
- Use clear plastic bins: one for the kitchen, one for camp essentials. Keep them packed between trips.
- Load the car in reverse: the tent and footprint go in last so they come out first.
- Keep rain gear, headlamps and snacks where you can reach them.
- Bring a printed checklist and tick items off.
What to Wear
Dress in layers you can add or remove as the day changes. A practical set for most three-season trips is a moisture-wicking base layer (synthetic or wool rather than cotton, which stays wet), an insulating layer such as a fleece or light puffy jacket, and a waterproof shell. Add sturdy shoes or trail runners with good grip, a pair of camp sandals for around the site, warm socks for sleeping and a knit hat. Pack one complete set of dry clothes in a sealed bag that you do not touch until bedtime or an emergency.
Step 7: Arrive Early and Set Up Camp
Aim to arrive with at least two to three hours of daylight left. Setup always takes longer the first time.
- Walk the site. Find the flattest, highest spot for the tent, away from low spots where rain collects and clear of dead branches overhead.
- Pitch the tent first. Clear sticks and stones, lay the footprint, set up the tent, stake it out and add the rainfly even if the sky is clear.
- Set up beds. Inflate pads and lay out sleeping bags so they loft.
- Set up the kitchen on the picnic table, with the cooler in the shade.
- Organize. Headlamps and lanterns out before dark.
Step 8: Sleep Well
A good night’s sleep makes or breaks a first trip.
- Use a proper sleeping pad. Two pads stacked is a great fix if you sleep cold.
- Change into dry clothes before bed; damp clothes make you cold.
- Wear a warm hat and socks if the night is cool.
- Eat a snack before bed. Your body generates heat as it digests.
- Bring earplugs. Campgrounds have early-rising neighbors and noisy birds.
- Go to the restroom right before bed.
Step 9: Be a Good Neighbor
- Respect quiet hours.
- Do not walk through other campers’ sites.
- Keep pets leashed and quiet.
- Keep lights pointed down, and generators off at night where they are allowed at all.
Step 10: Store Food and Trash Properly
Raccoons, squirrels, birds and, in some regions, bears are attracted to food. Never leave food, coolers, trash or scented items out unattended or in your tent. Store them in your vehicle or in campground food lockers, and follow posted wildlife rules carefully.
Step 11: Pack Out and Leave It Better
- Put out your fire completely: drown, stir and feel.
- Pack out all trash, including small bits like twist ties and bottle caps.
- Shake out and, if possible, dry the tent before packing. If it is wet, set it up at home to dry within a day or two to prevent mildew.
- Walk the site one last time to look for anything left behind.
A Sample First-Trip Timeline
It helps to picture the trip hour by hour. Here is a relaxed two-night plan that works for most beginners.
Two weeks before
Reserve the site, borrow or rent any missing gear, and set up the tent at home. Start your packing checklist.
The day before
Prep and pack food, freeze water bottles, charge headlamps and phones, check the forecast and load everything except the cooler.
Day one
Leave home late morning, stop for ice and firewood near the campground, and arrive by mid-afternoon. Set up the tent and beds first, then the kitchen. Take a short walk to learn the campground layout and find the restrooms and water. Cook an easy dinner, enjoy the evening, and start winding down by quiet hours.
Day two
Sleep in a little, make a warm breakfast and spend the day exploring: a trail, a lake, a visitor center. Return to camp in the late afternoon, cook dinner before dark and enjoy a long evening outside.
Day three
Have a simple breakfast, start packing two hours before check-out, let the tent dry in the sun if possible, and walk the site one last time before leaving.
Common First-Trip Mistakes
- Arriving after dark. Setup becomes hard and frustrating.
- Skipping the sleeping pad. Cold, sore and sleepless is the result.
- Forgetting the rainfly or rain gear. Weather changes fast.
- Overplanning meals. Simple food tastes great outdoors.
- Bringing too much. More gear means more to manage.
- Not checking the forecast on the morning you leave.
Camping With Kids or Dogs
Children and dogs can be wonderful camping companions, and a little planning goes a long way. For kids, bring a familiar pillow or stuffed animal, a headlamp of their own and a few simple activities such as a nature scavenger hunt or a card game. Set clear boundaries for exploring the site and the fire area. For dogs, bring a leash and tie-out, water and food bowls, a towel, waste bags and a blanket for the tent. Check the campground’s pet rules before you book, and never leave a dog alone at the site.
After the Trip: Take Notes
When you get home, write down what worked, what you missed and what you never used. That list makes your next trip easier and helps you decide what gear is worth buying. Many campers keep a running checklist they refine every trip.
Camping is one of many ways to spend more time outdoors and build practical skills. If that appeals to you, our Frontier family site offers a plain-spoken look at what homesteading really means.
Gear mentioned in this video
As an Amazon Associate I earn from qualifying purchases.
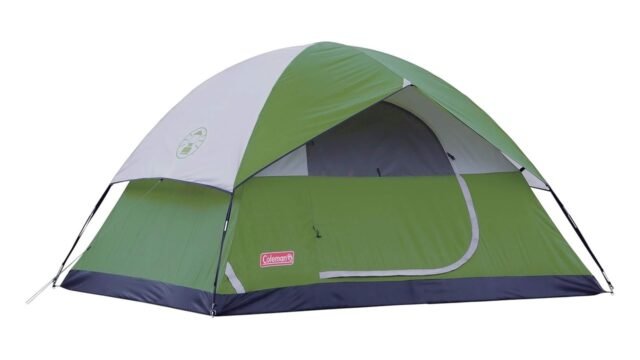
- Coleman Sundome Camping Tent with Rainfly: An easy starter dome tent with a full rainfly.
- Klymit Static V Sleeping Pad: A light inflatable pad to get you off the cold ground. This variant lists no R-value, so it suits warmer trips.
- Coleman Bottletop Propane Stove: A simple one-burner stove for coffee and easy first-trip meals.
- Petzl Tikkina 300 Lumen Headlamp: A headlamp for each person makes evenings and restroom trips easy.
- Coleman Portable Camping Chair with 4-Can Cooler: A comfortable camp chair with a small cooler built into the armrest.
Keep Going
- New to the site? Start Here for our beginner guides.
- Traveling by RV instead? Our sister site Campers Frontier has beginner guides for RV travelers.
Get The First Camping Trip Checklist
Everything in this plan, on two printable pages.
A free 2-page printable for a relaxed, well-prepared first night outside.
- Planning, shelter and sleep, and the camp kitchen
- Clothing layers, safety basics and Leave No Trace
- A quick night-before check, plus the beginner mistakes worth skipping
Free. About one email a week with camping guides and simple camp recipes. Unsubscribe anytime.
Watch every guide on YouTube: youtube.com/@campingfrontier.
Frequently Asked Questions
How much does a first camping trip cost?
If you borrow or rent gear, the main costs are the campsite fee, food, fuel and firewood. Buying basic gear new can be done affordably if you focus on a decent tent, sleeping pad and sleeping bag first.
What if it rains?
Pitch the tent with the rainfly taut, keep gear inside off the walls, and string a tarp over the picnic table. Rain on a tent can be one of the coziest parts of camping when you are dry inside.
Is it safe to camp alone?
Many people camp solo happily. For a first trip, a developed campground with a host is a good choice. Tell someone your plans and expected return.
Do I need a campfire?
No. A stove and lantern are all you need, and fires are often restricted in dry seasons.
Safety Notes
- Tell someone where you are going and when you will return.
- Check weather forecasts and fire restrictions before leaving.
- Never use a stove, grill, heater or lantern that burns fuel inside your tent. Carbon monoxide can kill.
- Keep a first aid kit and know where the nearest medical facility is.
- Keep food stored securely and follow local wildlife guidance.
- Stay hydrated and use sun protection, even on cool days.
Your first camping trip does not have to be perfect to be wonderful. Keep it simple, stay flexible, and enjoy the quiet moments: the first cup of coffee in the morning air, the stars after dark. That is what keeps people coming back.

1 comment